
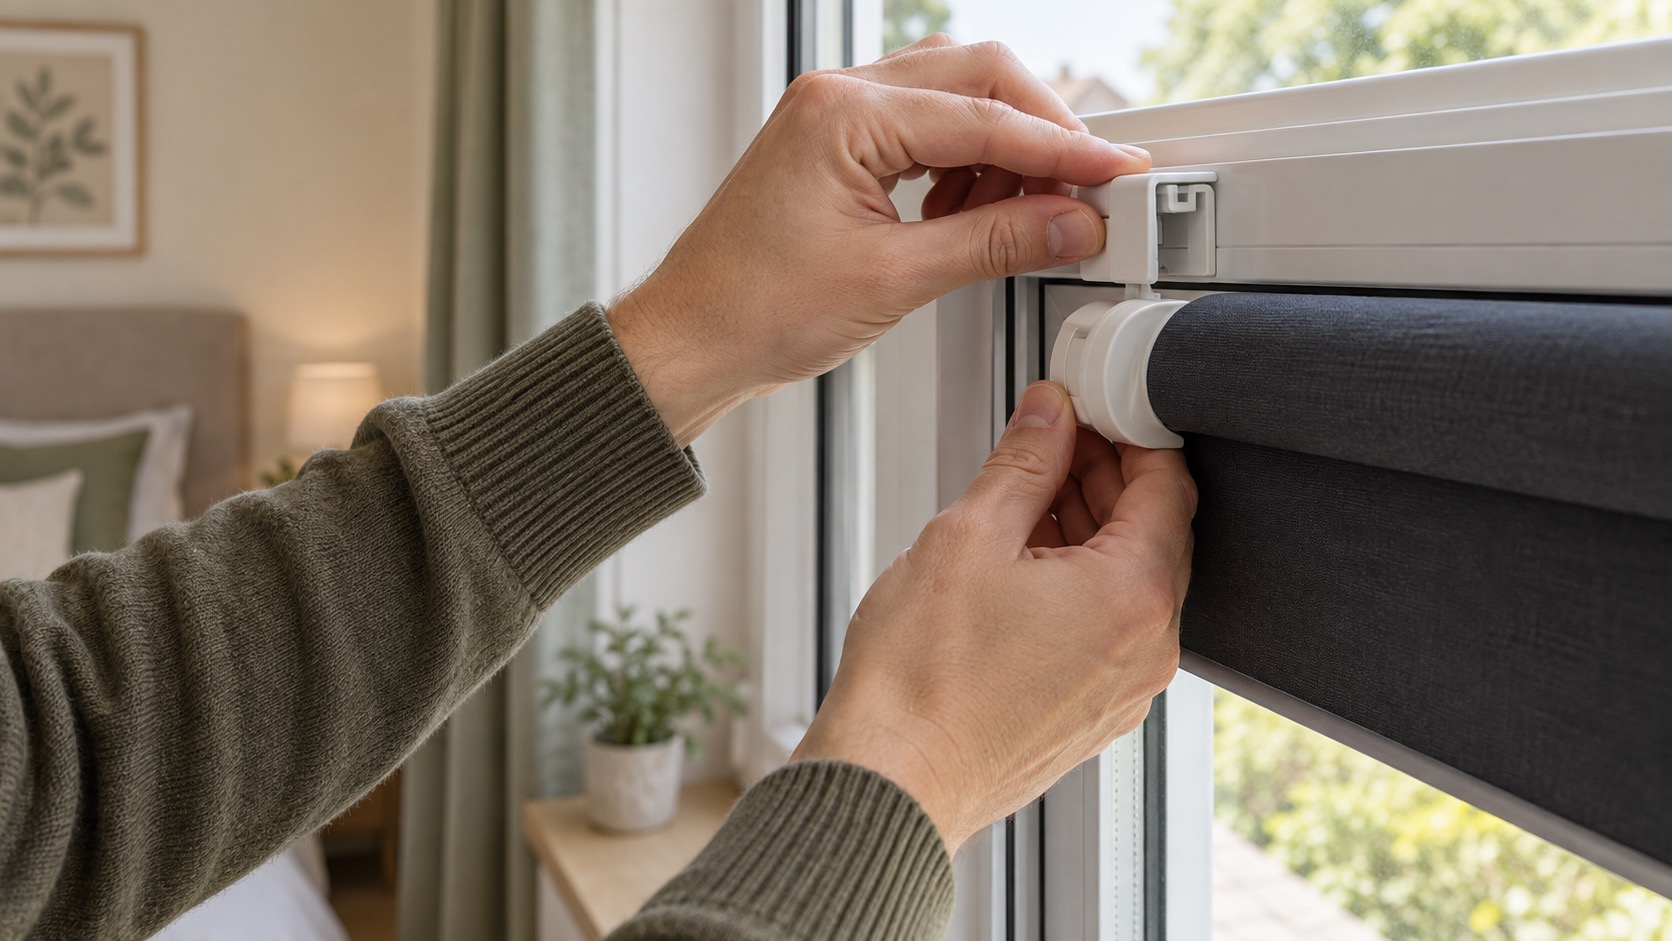
Compatibility check before you attach anything
Mark each point against the exact blind’s instructions. A clear fixing surface does not compensate for a blocked vent or a handle that cannot turn. If an answer is unknown, pause before loading the blind.
| Check | Clip-on sash | Adhesive bracket or panel | Tension recess |
|---|---|---|---|
| Frame and support | Opening sash profile and thickness within the maker’s stated range; clip clear of gasket and drainage | Named approved surface, sound finish, dry and clean by the maker’s method | Opposing sound, parallel surfaces and width within the specified range |
| Fixing method | Clip seats without force, seal compression or improvised packing | Correct pads, pressure and any cure period; approved removal route | Correct preload without marking, slipping or distorting the reveal |
| Handle and opening | Full sash sweep, lock and handle arc remain usable with the rolled-up blind | Full roll and brackets clear the handle and opening path | Opening window and escape access remain functional |
| Ventilation | Clip avoids trickle vent and its operating control | Cover and fixing do not seal a required vent or trap damp | Headrail does not obstruct the intended vent path |
| Control and children | For any looped cord or chain, the supplied safety device must be securely fitted as instructed. If the required fixing is not possible here, choose another system; a no-drill bracket does not exempt the control. | ||
Dry-fit the unloaded parts and cycle the window before the final fixing. Then check the complete blind in raised and lowered positions. For a more detailed vent path, use fitting around trickle vents; for looped controls, follow the UK product-safety guidance. The existing-home ventilation guide for England explains why intended ventilation should stay usable.
Identify the no-drill system first
“No drill” describes several unrelated fittings. A clip-on bracket hooks over an opening uPVC sash. An adhesive bracket bonds to glass or frame. A tension blind presses between two recess walls. A removable fabric panel uses suction cups or hook-and-loop tabs. Instructions for one cannot be transferred to another.
Find the exact product manual and check the allowed frame or surface. Measure the relevant thickness, recess width and clearance. Look for rubber seals, drainage routes, trickle vents, locks and handles. The bracket must not crush a gasket or stop the window closing.
Inspect the frame condition. Brittle paint, loose veneer, silicone residue, condensation and textured finishes are poor adhesive bases. A clip designed for a modern uPVC sash may not suit timber, aluminium or a flush window with no return.
Check the complete blind, not just the bracket
Confirm that the fabric width covers enough of the glass and that the drop reaches the bottom. The full roll must clear the reveal, handle and ceiling when the window opens. A long blackout drop creates a larger rolled diameter than a short sample photograph may suggest.
Check the control. A cordless spring shade avoids a hanging loop. A chain-operated no-drill blind still needs the supplied tensioner or other safety device fixed as instructed. If that part requires a screw and the landlord prohibits it, the blind may not be suitable despite its headline description.
Lay out every supplied component and compare it with the manual. Do not substitute household tape, cable ties or stronger glue.
Prepare the frame or surface
Open and close the window, noting the seal line and handle arc. Mark proposed bracket positions with a removable method that is safe for the finish. Hold the unloaded brackets in place and repeat the full window movement.
For adhesive fittings, follow the specified cleaning method. Some adhesives need a clean dry surface but can be weakened by household polish, solvent or detergent residue. Do not use a chemical cleaner simply because it feels stronger. Let the surface dry fully.
Check room temperature and curing instructions. Cold glass, condensation or immediate loading can undermine a bond. If the manual specifies a waiting period, the blind must remain off the brackets until it ends.
For clip-on fittings, protect the frame while positioning and ensure both clips are the same distance from their corners. Do not hammer them or force them over a profile outside the stated range.
Fit the blind step by step
- Dry-fit the unloaded brackets. Align them at the specified spacing and confirm the roll will be level.
- Test the window. Close, lock and reopen it. Inspect the gasket for pinching and listen for unexpected resistance.
- Fix or seat the brackets. Apply only the pressure, tension or adhesive process in the instructions.
- Observe any cure time. Do not shorten it because the bracket feels firm to the touch.
- Mount the blind. Support the roll with two hands and engage each end in the stated order. Do not hang the full weight from one partly engaged bracket.
- Fit the control safety device. For a chain or cord, this is part of installation, not an optional accessory.
- Operate slowly. Lower and raise the blind through several complete cycles while watching both brackets and the fabric path.
- Recheck window function. The sash, handle, lock, vent and safe opening must still work normally.
Stand back and assess the fabric. If it rolls to one side, check that the brackets are level and the tube is fully seated. Do not pull the lower corner to compensate.
Child safety remains essential
The Office for Product Safety and Standards warns that blind loops can endanger young children. New looped products must include appropriate safety provision, and tensioners need secure fitting. Keep cots, beds, highchairs, playpens and climbable furniture away from the window.
The British Blind and Shutter Association recommends safe-by-design blinds without accessible cords or chains, or with concealed or tensioned controls, especially where children live or visit. A cordless no-drill shade is a sensible starting point, but its brackets must still be secure.
Do not place a cot under a blind because no screw holes are visible. Review the room again when a child begins standing or climbing.
Troubleshoot movement, gaps and stiffness
If an adhesive bracket moves, lower the blind safely and remove the load. Do not press it back and add a different glue. Identify contamination, surface incompatibility, missed cure time or excess weight, then follow the manufacturer’s replacement process.
If a clip shifts, check that the frame thickness is within range and that the clip is fully seated without crushing the seal. A shim is not acceptable unless supplied for that exact system.
If the blind is stiff, confirm the roll is level and not rubbing the reveal. Check that control and idle ends are in the correct brackets. For a cordless model, use only the maker’s tension adjustment method.
Edge light is not necessarily a fitting fault. An open roller’s cloth is narrower than its mechanism. Centre the blind and assess whether a compatible wider face fit, curtains or a removable panel would be a better solution. Do not extend the cloth with taped strips.
Inspect after installation
Check the brackets after the first few operating cycles, after 24 hours and periodically thereafter. Temperature changes and repeated opening can reveal movement. Stop using the blind if a bracket lifts, a chain device loosens or the fabric catches.
Keep the frame and attachment area dry. Deal with persistent condensation rather than letting water sit behind adhesive. Dust the blind using its care instructions and support it during cleaning so the brackets are not twisted.
In a rental, retain the manual, spare release tools and photographs of the original surface. Label any removed components and keep them away from children.
Remove the blind without forcing it
Raise the blind, support the roll and release it from the brackets in the documented order. Remove the weight before attempting to detach clips or adhesive pads.
For adhesive, use the specified pull tab, angle, heat limit or remover. Do not lever against glass or flood the frame with solvent. Work slowly and stop if paint or veneer begins to lift. For clips, open the sash safely and release the retaining feature rather than twisting the bracket off.
Clean residue only with a method approved for the frame. Photograph the finished surface in a rental. If the fitting will be reused, inspect every part before storing it dry.
Bottom line
A successful no-drill installation comes from compatibility and preparation, not extra adhesive. Choose the correct system for the frame, protect seals and window function, use the exact safety hardware and test the blind under repeated operation.
For selecting a format before fitting, compare our best blackout roller blinds and temporary blackout blinds.
Products for this job
Three no-drill formats to compare
These examples use clip-and-adhesive, cordless no-drill and removable hook-and-loop fixing. Follow the instructions for the exact selected model.
Amazon Basics blackout roller blind, dark grey, 56 × 150 cm
Best for: A compact adhesive-and-clip installation
A compact roller blind whose clip-and-adhesive mounting avoids drilling into the frame. The listed fabric is opaque, but the roller mechanism still leaves perimeter routes for daylight.
What stands out
- Mounting clips are listed as requiring no drilling
- Available in several compact widths
- Raises and lowers like a normal roller blind
Keep in mind
- Adhesive removal can affect delicate surfaces
- The cord tensioning device is safety-critical
- The 150 cm drop will not suit every window
- 56 × 150 cm
- Polyester
- No-drill clips
- Cord controlled
LazBlinds cordless no-drill blackout shade, black, 36 × 72 in
Best for: A window where a control loop is best avoided
A spring-operated cordless shade that attaches without conventional drilled brackets. It removes the hanging loop found on many ready-made rollers, but its stick-on installation still needs a compatible, clean surface.
What stands out
- Cordless spring operation
- No conventional drilling
- Opaque black fabric in the featured variant
Keep in mind
- A fixed ready-made width will not suit every recess
- Adhesive or pressure fittings still depend on the surface and instructions
- No-drill does not guarantee mark-free removal
- 36 × 72 in
- Cordless
- No-drill mounting
- Black
Easynight Blackout Blind, regular 150 × 145 cm
Best for: A removable cover with generous edge overlap
A cut-to-size blackout sheet fixed around the window frame with removable hook-and-loop attachments. It can cover the complete opening more closely than an ordinary roller blind and packs into a storage bag between uses.
What stands out
- Can be cut for an unusual window shape
- Hook-and-loop attachment can reduce perimeter gaps
- No drilling and a storage bag is included
Keep in mind
- Adhesive suitability depends on the frame finish
- Less convenient than a blind for frequent daylight access
- The fabric can look utilitarian in a finished bedroom
- 150 × 145 cm
- Cut to size
- Hook-and-loop fixing
- Storage bag