
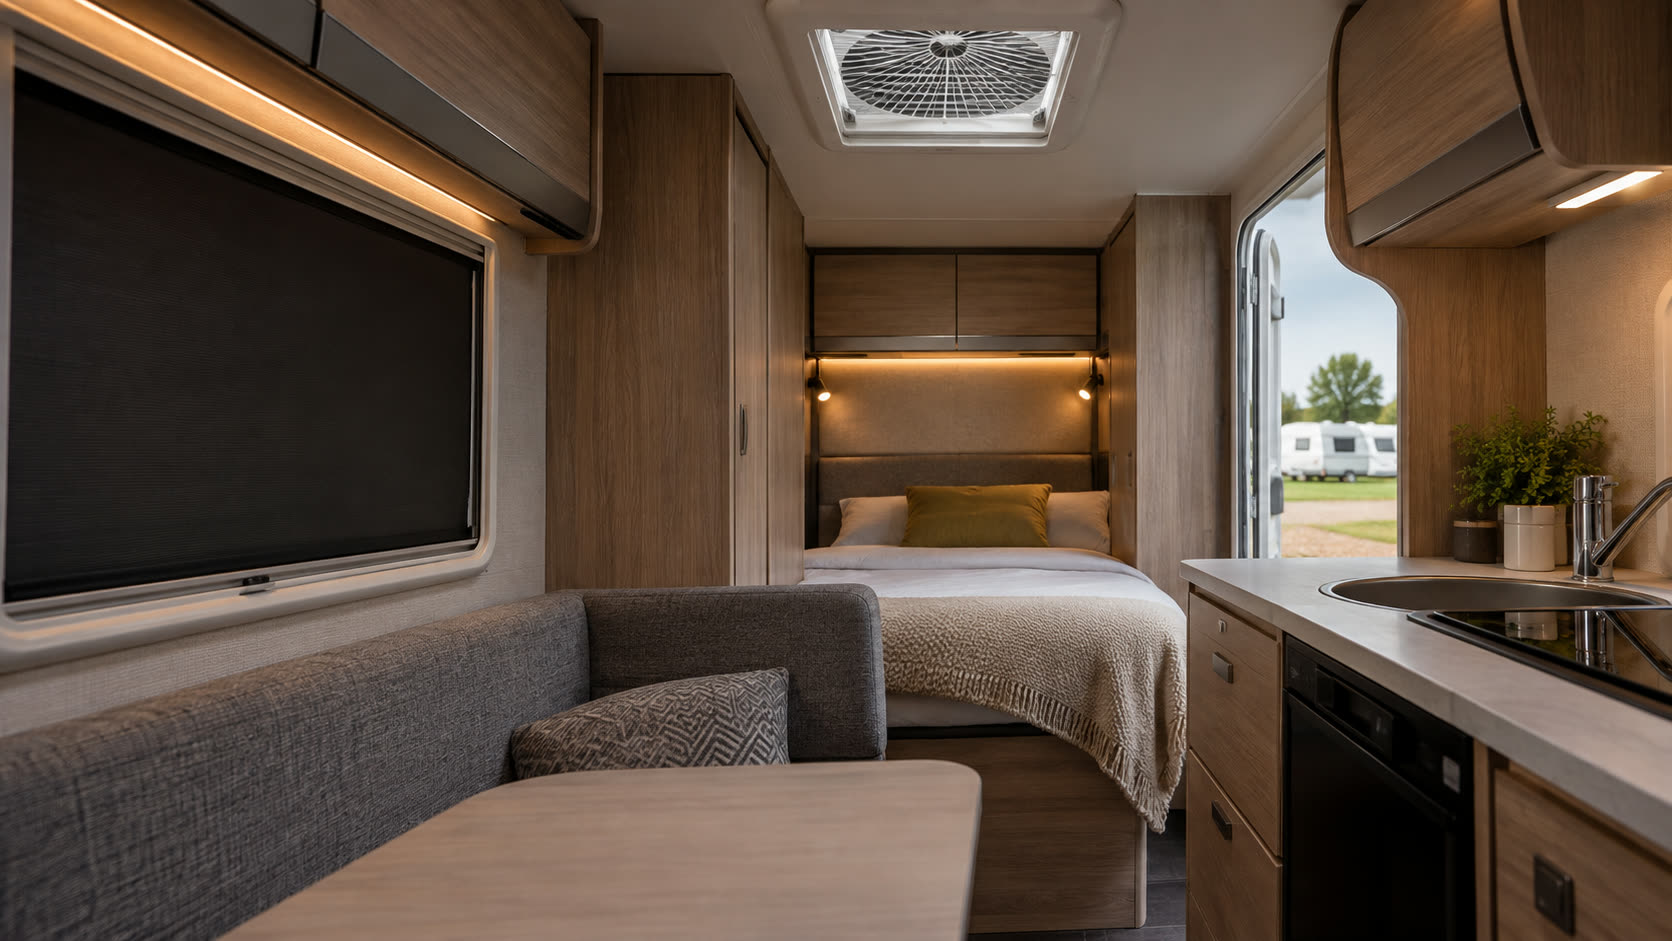
A caravan window is not a standard bedroom window
First find out what is already fitted. Many caravans have an integrated blind and insect-screen cassette surrounding the side window or rooflight. The dark panel, mesh panel, catches and side tracks may each have a different function. If the light-blocking panel is damaged, a like-for-like replacement part may give a neater result than a household portable sheet. Look for the caravan, window and rooflight manufacturer labels and any manual stored with the vehicle. Photograph the full cassette and its latch before removing anything.
The Caravan and Motorhome Club's insulation advice notes that double-skinned acrylic windows are standard in nearly all modern caravans and motorhomes. Acrylic is not ordinary household glass. A suction product marketed for smooth glass may not grip as intended or may be unsuitable for the surface; an adhesive could leave residue or interact with it. Do not infer compatibility from a product photograph. Check the window maker's care instructions and the covering maker's surface list before attaching anything directly to the pane.
Window geometry also differs. An outward-opening side window may have stays and latches close to the frame; rooflights may have handles, screens and ventilation slots. Measure the clear viewing area, the internal frame, cassette depth and any opening path separately. A dark sheet that covers the glass but prevents the window from opening or the flyscreen from sliding is not a successful fit. Our roof-window code guide is for domestic roof windows and should not be assumed to identify a caravan rooflight.
Compare caravan-specific ways to reduce light
The best first option is often the caravan's own integrated blackout or room-darkening blind, adjusted or repaired if it is designed for that window. A manufacturer-specific replacement cassette can preserve its normal operation and avoid improvised adhesive. Check whether the quoted part includes the frame, fabric, screen and fasteners or only a replacement panel. Some fitted blinds are intended to reduce glare rather than block every line of daylight; the meeting line between screen and blind can still glow.
A fitted curtain or removable interior panel may help around a berth if the vehicle has suitable fixing points and the material is kept clear of controls. Use existing track or press-stud positions where the caravan maker permits it; do not drill into an unknown wall, wiring route or waterproof assembly. A custom panel should be designed for that specific opening and be easy to remove for ventilation and daytime use. It should not hang loose over a bed or obstruct an exit.
| Option | Useful where | First check |
|---|---|---|
| Existing cassette blind | Mechanism is intact or repairable | Model and replacement part identity |
| Model-specific replacement | Original blind failed | Window code, dimensions and frame generation |
| Fitted interior curtain | Existing safe fixing points exist | Opening path and fabric clearance |
| Household suction/adhesive sheet | Only if explicitly approved | Acrylic compatibility and removal method |
This page deliberately has no generic product card. The current household portable products in the site catalogue are not verified for an identified caravan acrylic window or cassette. Recommending one simply because it looks compact would create a false fit expectation. Shop by the exact vehicle-window model and approved fitting method instead. If you are unsure, ask the caravan or window manufacturer or an experienced caravan fitter.
Keep the manufacturer's ventilation working
The same Caravan and Motorhome Club guidance says not to block manufacturer-provided ventilation and discusses moisture and condensation in caravans. A blind should not be taped across a fixed vent, a rooflight's ventilation path or an opening needed for normal use. Darkness and ventilation are separate goals. If condensation gathers behind a tightly fitted temporary panel, remove it and dry the area as the window maker advises. Do not rely on dark fabric to manage temperature or moisture.
If children use the caravan, check every operating cord and the proximity of berths and seating. The OPSS blind-cord guidance advises keeping furniture, including beds and cots, away from blinds with cords. Compact interiors make separation difficult; a safe-by-design control or a different berth layout may be needed. Do not place loose shade fabric or fittings where they can fall into a child's sleep space. Keep exits, window latches and rooflight handles accessible.
Order from a model record, not a generic width
Write down the caravan make, model and year; window or rooflight label; cassette exterior and internal measurements; number of panels; fabric orientation; and fixing positions. Photograph any broken clip and the undamaged side for comparison. Ask the part supplier to confirm the exact compatible generation and what is included. Two caravans with similarly sized panes can have different cassettes, rounded corners or attachment points. Avoid trimming a replacement before confirming the maker's instructions.
Finally, check the solution with the window fully open and closed and with the blind in every operating position. Confirm no vent is covered, no latch is blocked and the cover remains secure while the vehicle is stationary and in normal use. If a temporary panel must be removed before travel, follow that instruction. A well-matched caravan-specific system is more valuable than a nominally “blackout” material that cannot be used safely with the vehicle's window design.